
- Throne of Thunder
- Manaforge Omega
- MSV / HoF / ToES
- Liberation of Undermine
- Dragon Soul
- Nerub-ar Palace
- TotFW / BWD / BoT
- Aberrus
- Câmara dos Encarnados
- Cidadela da Coroa de Gelo
- Santuário Rubi
- Trial of the Crusader
- Rotmire
- Imperator Averzian
- Vorasius
- Vaelgor & Ezzorak
- Fallen-King Salhadaar
- Lightblinded Vanguard
- Crown of the Cosmos
- Chimaerus the Undreamt God
- Belo'ren, Child of Al'ar
- Midnight Falls
- Immerseus
- Fallen Protectors
- Norushen
- Sha of Pride
- Galakras
- Iron Juggernaut
- Kor'kron Dark Shaman
- General Nazgrim
- Malkorok
- Spoils of Pandaria
- Thok the Bloodthirsty
- Siegecrafter Blackfuse
- Paragons of the Klaxxi
- Garrosh Hellscream
- Jin'rokh the Breaker
- Horridon
- Council of Elders
- Tortos
- Megaera
- Ji-Kun
- Durumu the Forgotten
- Primordius
- Dark Animus
- Iron Qon
- Twin Empyreans
- Lei Shen
- Ra-den
- Plexus Sentinel
- Loom'ithar
- Soulbinder Naazindhri
- Forgeweaver Araz
- The Soul Hunters
- Fractillus
- Nexus-King Salhadaar
- Dimensius, the All-Devouring
- The Stone Guard
- Feng the Accursed
- Gara'jal the Spiritbinder
- The Spirit Kings
- Elegon
- Will of the Emperor
- Imperial Vizier Zor'lok
- Blade Lord Ta'yak
- Garalon
- Wind Lord Mel'jarak
- Amber-Shaper Un'sok
- Grand Empress Shek'zeer
- Protectors of the Endless
- Tsulong
- Lei Shi
- Sha of Fear
- Vexie and the Geargrinders
- Cauldron of Carnage
- Rik Reverb
- Stix Bunkjunker
- Sprocketmonger Lockenstock
- One-Armed Bandit
- Mug'Zee, Heads of Security
- Chrome King Gallywix
- Morchok
- Warlord Zon'ozz
- Yor'sahj the Unsleeping
- Hagara the Stormbinder
- Ultraxion
- Majordomo Staghelm
- Spine of Deathwing
- Madness of Deathwing
- Ulgrax the Devourer
- Bloodbound Horror
- Sikran, Captain of the Sureki
- Rashanan
- Broodtwister Ovinax
- Nexus Princess Kyveza
- Silken Court
- Queen Ansurek
- Conclave of Wind
- Al'akir
- Omnotron Defense System
- Magmaw
- Atramedes
- Chimaeron
- Maloriak
- Nefarian
- Halfus Wyrmbreaker
- Valiona & Theralion
- Ascendant Council
- Cho#gall
- Sinestra
- Kazzara
- The Amalgamation Chamber
- The Forgotten Experiments
- Assault of the Zaqali
- Rashok, the Elder
- Zskarn
- Magmorax
- Echo of Neltharion
- Scalecommander Sarkareth
- Lord Marrowgar
- Lady Deathwhisper
- Gunship Battle
- Deathbringer Saurfang
- Festergut
- Rotface
- Professor Putricide
- Blood Prince Council
- Blood-Queen Lana'thel
- Valithria Dreamwalker
- Sindragosa
- The Lich King
- Halion
- Northrend Beasts
- Lord Jaraxxus
- Faction Champions
- Twin Val'kyr
- Anub'Arak
MSV / HoF / ToES
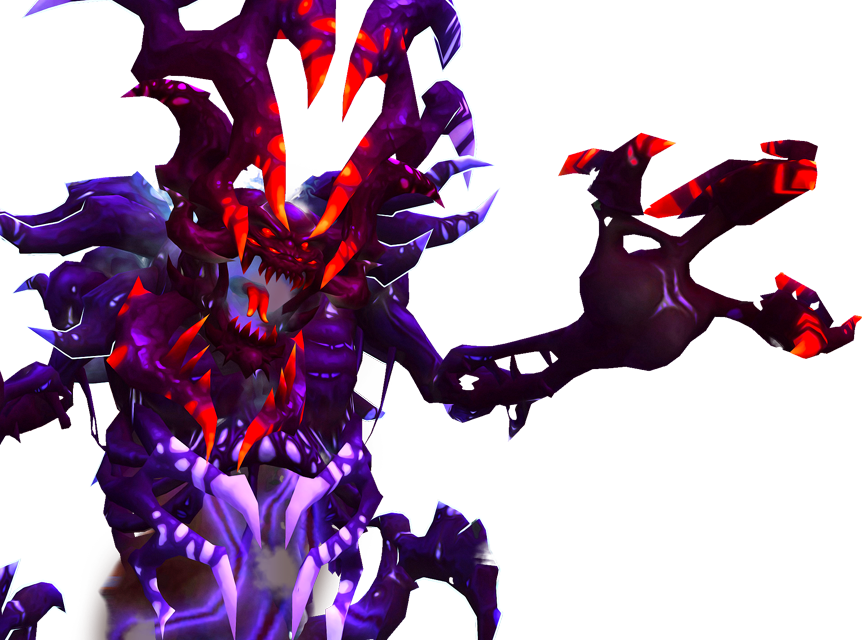
Sha of Fear
Guia de Estratégia
On Normal mode, Sha will stay on the Terrace for the duration of the fight.
Players will periodically be teleported to the Outer Shrines through Omnious Cackle to fight the Guardians. They will return upon defeating them.
Agradecimentos a Kalazshar e Wycano, da Aliança Cromática pela localização para Português.
The fight starts on the Terrace of Endless Spring.
On Heroic, the raid must take Sha down to 66% while managing players being sent to the Outer Shrines to face Guardians of the Terrace.

A mechanic to ensure a player is always in the circle of Pure Light.
Sha will hit a distant target with fatal Shadow damage and increase their Shadow damage taken by 25% for 8 seconds.

Random players are targeted with a splash AoE, spread out where you can to avoid dealing moderate Shadow damage to all players.

The Sha strikes 3 times on every fourth attack. Try to use mitigation when possible.

Sha periodically calls upon Terror Spawns that attack using Penetrating Bolt.
These Spawns will deflect all attacks from the front and so must be killed by players positioned behind.
While these can be killed, a common strategy is to ignore them and just dodge the Penetrating Bolt.
The bolt will be hurled at a player and cause moderate Shadow damage within 3 yards and increase their Shadow damage taken by 25% for 15 seconds. Spread out and focus on the boss.

Five players will be targeted and sent to one of three outer shrines located around the terrace.
This will always target a single Tank and Healer, and then DPS.
Make sure to defeat these platforms fast so that you have enough Tanks to battle Sha.

Sha releases a breath to any player not behind the Wall of Light, dealing fatal Shadow damage and fearing for 1.5 seconds.
Stand behind the Wall of Light at all times.

A narrow column of Pure Light still projects Skyward from the center of the terrace.
When a player stands in this circle, a Wall of Light is formed. Sha will target the player in the circle.
The Wall of Light will deflect Sha's Breath of Fear and reduce all damage taken by 10%.
A mechanic to ensure a player is always in the circle of Pure Light.
Sha will hit a distant target with fatal Shadow damage and increase their Shadow damage taken by 25% for 8 seconds.
Five players will be targeted and sent to one of three outer shrines located around the terrace.
This will always target a single Tank and Healer, and then DPS.
Make sure to defeat these platforms fast so that you have enough Tanks to battle Sha.
Random players are targeted with a splash AoE, spread out where you can to avoid dealing moderate Shadow damage to all players.
Sha releases a breath to any player not behind the Wall of Light, dealing fatal Shadow damage and fearing for 1.5 seconds.
Stand behind the Wall of Light at all times.
The Sha strikes 3 times on every fourth attack. Try to use mitigation when possible.
A narrow column of Pure Light still projects Skyward from the center of the terrace.
When a player stands in this circle, a Wall of Light is formed. Sha will target the player in the circle.
The Wall of Light will deflect Sha's Breath of Fear and reduce all damage taken by 10%.
Sha periodically calls upon Terror Spawns that attack using Penetrating Bolt.
These Spawns will deflect all attacks from the front and so must be killed by players positioned behind.
While these can be killed, a common strategy is to ignore them and just dodge the Penetrating Bolt.
The bolt will be hurled at a player and cause moderate Shadow damage within 3 yards and increase their Shadow damage taken by 25% for 15 seconds. Spread out and focus on the boss.
After being sent to the Shrines by Sha, you will have to face 1 of 3 opponents (Cheng Kang, Yang Guoshi or Jinlun Kun) to return to the Terrace.
Dance to avoid fears and walk into the orbs to prevent healing to succeed.
HIDE FROM THE AOE
WHILE TANK COLLECT GLOBES

Spinning in a circle, the Guardian will unleash a hail of bolts for 5 seconds in all directions that deal massive Physical damage.
Players should run and hide behind pillars until the Blossom has completed.
The Tank should stay out and use cooldowns to survive so that they can run around and collect Sha Globes for the duration to prevent healing.
EVERYONE
SOAK THE ORBS

As the health of the Guardian goes down, they will spawn Sha Globes.
Globes will inflict low Shadow damage and be consumed when a player runs into them.
If not soaked in 8 seconds, the Guardian will be healed for 8% maximum health.
FOLLOW THE PATTERN
TO DODGE THE BOLTS

The Guardian rapidly fires sprays of Dread Bolts in specific directions for 8 seconds. Each wave deals moderate Shadow damage and applies a debuff that will fear you if you are hit a second time.
This mechanic may seem complicated, but the pattern is always the same for each Guardian.
In the attached video, you can see the player intentionally taking a single hit while following the WeakAura because the route it suggests guarantees no second hit.
Each shrine has a different order, so pay attention to the suggested pattern!

Upon returning from a Shrine, you will receive Fearless.
This increases damage and healing done by 60%, movement speed by 150%, and grants immunity to Fear effects for 30 sec.
This allows you to stand in Breath of Fear for the duration.

A replacement for melee attacks, the Terrace Guardians Shoot the current player with aggro.
3 Tanks (at least) should be used to ensure you have a Tank every time groups are transported to a platform by Omnious Cackle.
Upon returning from a Shrine, you will receive Fearless.
This increases damage and healing done by 60%, movement speed by 150%, and grants immunity to Fear effects for 30 sec.
This allows you to stand in Breath of Fear for the duration.
A replacement for melee attacks, the Terrace Guardians Shoot the current player with aggro.
3 Tanks (at least) should be used to ensure you have a Tank every time groups are transported to a platform by Omnious Cackle.
