
- Throne of Thunder
- Manaforge Omega
- MSV / HoF / ToES
- Liberation of Undermine
- Dragon Soul
- TotFW / BWD / BoT
- Aberrus
- Icecrown Citadel
- Ruby Sanctum
- Trial of the Crusader
- Rotmire
- Imperator Averzian
- Vorasius
- Vaelgor & Ezzorak
- Fallen-King Salhadaar
- Lightblinded Vanguard
- Crown of the Cosmos
- Chimaerus the Undreamt God
- Belo'ren, Child of Al'ar
- Midnight Falls
- Immerseus
- Fallen Protectors
- Norushen
- Sha of Pride
- Galakras
- Iron Juggernaut
- Kor'kron Dark Shaman
- General Nazgrim
- Malkorok
- Spoils of Pandaria
- Thok the Bloodthirsty
- Siegecrafter Blackfuse
- Paragons of the Klaxxi
- Garrosh Hellscream
- Jin'rokh the Breaker
- Horridon
- Council of Elders
- Tortos
- Megaera
- Ji-Kun
- Durumu the Forgotten
- Primordius
- Dark Animus
- Iron Qon
- Twin Empyreans
- Lei Shen
- Ra-den
- Plexus Sentinel
- Loom'ithar
- Soulbinder Naazindhri
- Forgeweaver Araz
- The Soul Hunters
- Fractillus
- Nexus-King Salhadaar
- Dimensius, the All-Devouring
- The Stone Guard
- Feng the Accursed
- Gara'jal the Spiritbinder
- The Spirit Kings
- Elegon
- Will of the Emperor
- Imperial Vizier Zor'lok
- Blade Lord Ta'yak
- Garalon
- Wind Lord Mel'jarak
- Amber-Shaper Un'sok
- Grand Empress Shek'zeer
- Protectors of the Endless
- Tsulong
- Lei Shi
- Sha of Fear
- Vexie and the Geargrinders
- Cauldron of Carnage
- Rik Reverb
- Stix Bunkjunker
- Sprocketmonger Lockenstock
- One-Armed Bandit
- Mug'Zee, Heads of Security
- Chrome King Gallywix
- Morchok
- Warlord Zon'ozz
- Yor'sahj the Unsleeping
- Hagara the Stormbinder
- Ultraxion
- Majordomo Staghelm
- Spine of Deathwing
- Madness of Deathwing
- Ulgrax the Devourer
- Bloodbound Horror
- Sikran, Captain of the Sureki
- Rashanan
- Broodtwister Ovinax
- Nexus Princess Kyveza
- Silken Court
- Queen Ansurek
- Conclave of Wind
- Al'akir
- Omnotron Defense System
- Magmaw
- Atramedes
- Chimaeron
- Maloriak
- Nefarian
- Halfus Wyrmbreaker
- Valiona & Theralion
- Ascendant Council
- Cho#gall
- Sinestra
- Kazzara
- The Amalgamation Chamber
- The Forgotten Experiments
- Assault of the Zaqali
- Rashok, the Elder
- Zskarn
- Magmorax
- Echo of Neltharion
- Scalecommander Sarkareth
- Lord Marrowgar
- Lady Deathwhisper
- Gunship Battle
- Deathbringer Saurfang
- Festergut
- Rotface
- Professor Putricide
- Blood Prince Council
- Blood-Queen Lana'thel
- Valithria Dreamwalker
- Sindragosa
- The Lich King
- Halion
- Northrend Beasts
- Lord Jaraxxus
- Faction Champions
- Twin Val'kyr
- Anub'Arak
Manaforge Oméga
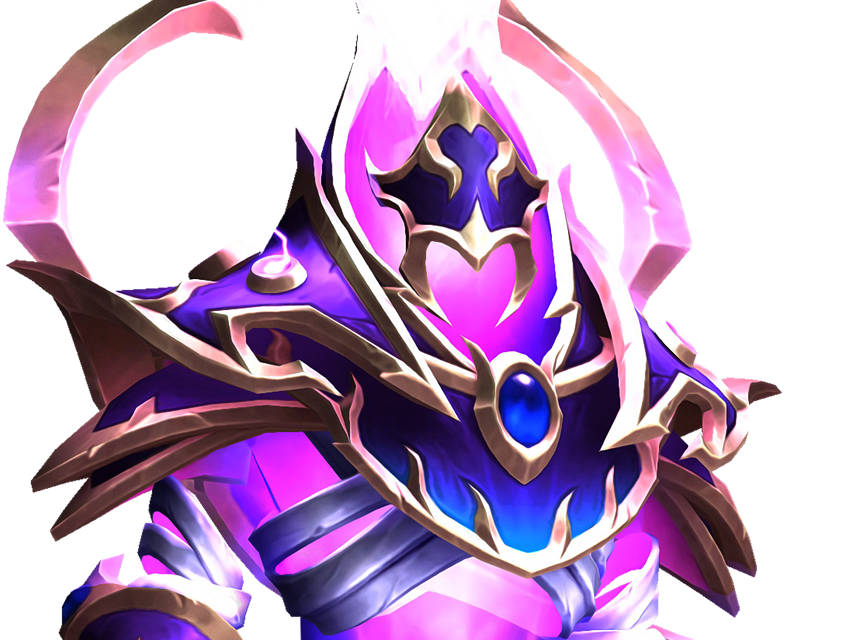
Tisseforge Araz
Guide - Stratégie
Ce combat compte beaucoup d'adds et se déroule ainsi : P1 - Transition - P1 - Transition - P2
En P1, le boss invoque un écho de lui-même qui copie ses sorts. Regroupez-le avec le boss et tuez-le.
En P1, le boss active 2 pylônes dans la salle. Ils invoquent des orbes qui essaient de les atteindre. Tuez les orbes avant.
Après 2 min 30 s, la transition démarre et dure jusqu'à ce que vous ayez détruit les pylônes. Le boss est invulnérable en transition.
Quand les pylônes ont été détruits, le boss est étourdit et prend 100% de dégâts en plus pendant 12 s. Puis la P1 recommence.
Après la 2nd transition ou quand le boss tombe à 15% PV, la P2 commence.
Tuez le boss avant que le trou noir ne vous attire et vous avale. Tuez les orbes avant qu'ils n'atteignent le trou noir.
Le boss active désormais 3 pylônes en P1 au lieu de 2.
Le boss et son écho doivent rester éloignés de 20 m, ou ils deviennent invulnérables et surpuissants.
Vous ne pouvez absorber l'invocation de l'écho qu'une seule fois par phase. Préparez 2 groupes pour les absorber.
En P1, quand un pylône fait invoquer un orbe à 3 joueurs, il invoque aussi une faille (cercle) à son opposé dans la salle.
À leur apparition, les orbes sont très rapides et invulnérables. Ils doivent traverser la faille pour pouvoir être contrôlés et tués.
En transition, vous devez détruire les 3 pylônes simultanément, ou le raid meurt.
Salut, je suis Dégno-KirinTor (EU) le traducteur français de Mythic Trap depuis des années. J'ai arrêté d'aider après Manaforge Omega. Je ne sais pas s'ils vont retrouver un traducteur ou une traductrice.
Tuez vite l'écho que le boss invoque, il copie ses techniques.
Le boss active des pylônes invulnérables pendant cette phase.
Les pylônes ciblent des joueurs qui invoquent des orbes.
Invoquez les orbes ensemble, contrôlez-les et tuez-les avant qu'ils n'atteignent un pylône et explosent.
TOUT LE MONDE
Faites 3 groupes pour absorber avec le tank.
Gardez le boss et l'écho éloignés. Tuez vite l'écho.

Incantation de 5.5 s sur le tank qui explose et inflige des dégâts magiques massifs partagés entre les joueurs touchés.
Chaque joueur ne peut absorber qu'une seule fois par phase. Faites 2 groupes qui absorbent chacun leur tour.
Puis un écho du boss apparaît à l'emplacement du tank. Tankez-le et tuez-le.
Gardez le boss et l'écho éloignés de 20 m, sinon ils deviennent invulnérables et tapent plus fort.
En première P1, le boss invoque son écho 2 FOIS.
En seconde P1, il ne l'invoque QU'UNE SEULE FOIS.
TOUT LE MONDE
Esquivez les orbes tirés par les pylônes.

Le boss canalise un rayon sur un pylône, ce qui l'active et lui fait tirer des orbes dans la salle à esquiver.
Si l'écho du boss est en vie, il canalise aussi sur un pylône activé et lui fait aussi tirer des orbes.
Il y a 3 pylônes dans la salle au lieu de 2. Le boss active les 3 au cours de la phase.
TOUT LE MONDE
Ne traversez pas les cercles. Invoquez les
orbes juste derrière le cercle pour qu'ils le
traversent en essayant de rejoindre le pylône.

Avant de cibler 3 joueurs et de les faire invoquer un orbe, les pylônes activés invoquent un cercle à leur opposé dans la salle.
Chaque pylône a un emplacement de cercle fixe.
NE LES TRAVERSEZ PAS !
Invoquez les orbes regroupés derrière le cercle pour qu'ils le traversent en rejoignant le pylône.
Ceci retire leur immunité et bonus de vitesse, et vous permet de les tuer.
TOUT LE MONDE
Invoquez les orbes derrière le cercle pour qu'ils le
traversent et tankez le boss devant le cercle.
Contrôlez et tuez les orbes dès qu'ils sont sous le boss.

Les pylônes activés appliquent régulièrement un DoT qui fait TRÈS MAL de 4 s sur 3 joueurs.
En expirant, ils invoquent chacun un orbe qui essaie de rejoindre le pylône.
Invoquez les orbes "derrière" le cercle pour qu'ils le traversent et perdent leur immunité.
Tankez le boss "devant" le cercle pour cueillir les orbes dès qu'ils sont attaquables.
Vous pouvez survivre à un orbe qui atteint un pylône, mais pas plus.
TOUT LE MONDE
Si ciblé, écartez-vous du boss et du raid.
Esquivez les cercles et dissipez les silences.

Le boss (et son écho) ciblent quelques joueurs et leur lancent des projectiles.
Ils font mal et réduisent au silence les joueurs touchés. Le silence est dissipable.
Écartez-vous du boss et du raid quand vous êtes ciblés.

Régulièrement, le boss applique une charge de DoT de 45 s sur le tank.
Échangez-vous le boss quand vous avez 2/3 charges (et que l'écho est mort).

Le raid subit des dégâts constant pendant la phase.

En P1, les pylônes sont invulnérables.
Régulièrement, le boss applique une charge de DoT de 45 s sur le tank.
Échangez-vous le boss quand vous avez 2/3 charges (et que l'écho est mort).
En P1, les pylônes sont invulnérables.
Le raid subit des dégâts constant pendant la phase.
Après 2 min 30 s en P1, la transition démarre. Le boss repousse le raid et devient invulnérable.
Tuez vite les pylônes dans l'ordre dans lequel ils accumulent de l'énergie. Un élémentaire apparaît peu après le début de la phase.
Quand les pylônes sont détruits, le boss est étourdit et prend 100% de dégâts en plus pendant 12 s, puis la P1 recommence.
Après la 2nd transition, la P2 commence.
TOUT LE MONDE
Détruisez les pylônes. Ne touchez pas le
rayon laser géant au centre de la salle.

Après 2 min 30s en P1, le boss repousse le raid, devient invulnérable et s'envole au-dessus de la console dans la salle.
Il invoque aussi un rayon laser géant au centre de la salle. Ne le touchez pas.
Vous devez détruire les 3 pylônes en même temps, ou le raid meurt.
TOUT LE MONDE
Évitez les rayons

Les pylônes tirent des rayons vers des joueurs, évitez-les.
SOIGNEURS
Tuez les pylônes dans l'ordre dans lequel ils
gagnent de l'énergie. Traînez l'élémentaire à côté
pour éviter d'énormes dégâts sur le raid.

Les pylônes gagnent lentement de l'énergie au cours de la phase, mais pas simultanément.
Quand l'un d'eux atteint 100 d'énergie, il inflige de lourds dégâts au raid pendant 4 s SAUF si un élémentaire est à côté du pylône.
Détruisez les pylônes dans l'ordre où ils gagnent de l'énergie.
TANKS
Tankez les élémentaires près des pylônes.
Tuez les pylônes dans l'ordre dans lequel
ils gagnent de l'énergie.

Quelques instants après le début de la transition, 2 élémentaires apparaissent au centre de la salle.
Tankez-les près des pylônes pour maximiser le DPS et pour qu'il absorbent Convergence Arcanique, sinon le raid meurt.
Détruisez les pylônes dans l'ordre dans lequel ils gagnent de l'énergie. Ayez un élémentaire à côté quand ils lancent Convergence Arcanique.
ÉVITEZ
Sortez des cercles.

Des éclairs frappent la salle pendant la phase, évitez-les.
TOUT LE MONDE
Boss est étourdit et prend 100% de
dégâts en plus à la fin de la transition.

Quand tous les pylônes ont été détruits, le boss revient dans la salle.
Il est étourdit et subit 100% de dégâts supplémentaires pendant 12 s.

Plus la transition dure, plus le raid subit de dégâts.
Plus la transition dure, plus le raid subit de dégâts.
Après la 2nd transition, ou quand le boss tombe à 15% PV, la P2 commence.
Le boss repousse le raid vers l'entrée de la salle.
Le mur à l'opposé de l'entrée devient un trou noir géant.
Tuez le boss avant que la force d'attraction du trou noir ne devienne trop forte et il vous avale.
TOUT LE MONDE
La force du trou noir augmente. Tuez le boss avant
de ne plus pouvoir résister et vous faire avaler.

Au début de la P2, le boss repousse le raid vers l'entrée de la salle.
Le mur à l'opposé de l'entrée devient un trou noir géant, indiqué par une ligne violette au sol.
Si vous traversez cette ligne, vous mourez.
Le trou noir attire constamment le raid vers lui et sa force d'attraction ne cesse de s'accroître.
Tuez le boss avant que vous ne puissiez plus résister.
TOUT LE MONDE
Invoquez les orbes sous le boss et contre le mur de l'entrée.
Contrôlez-les et tuez-les. Ne les laissez pas atteindre le trou noir.

Très similaire à la P1:
Le boss applique régulièrement un DoT de 4 s sur plusieurs joueurs qui fait très mal.
En expirant, ils invoquent chacun un orbe qui essaie de rejoindre le trou noir.
Invoquez les orbes sous le boss et contre le mur de l'entrée. Contrôlez-les et tuez-les.
S'ils atteignent le trou noir, ils infligent d'énormes dégâts au raid.
TOUT LE MONDE
Placez le boss et vous-même pour ne pas
vous faire envoyer dans le trou noir.

Régulièrement, le boss inflige un coup de dégâts au raid et vous repousse.
Ne vous faites pas envoyer dans le trou noir.
Replacez-le boss vers le centre de la salle pour aider le raid à se faire repousser vers le mur de l'entrée.
Comme en P1:
Le boss fait pleuvoir des projectiles dans la salle qui font mal et réduisent au silence les joueurs touchés.
Le silence se dissipe.
Comme en P1:
Régulièrement, le boss applique une charge de DoT de 45 s sur le tank.
Échangez-vous le boss quand vous avez 2/3 charges (et que l'écho est mort).
Comme en P1:
Le boss fait pleuvoir des projectiles dans la salle qui font mal et réduisent au silence les joueurs touchés.
Le silence se dissipe.
Comme en P1:
Régulièrement, le boss applique une charge de DoT de 45 s sur le tank.
Échangez-vous le boss quand vous avez 2/3 charges (et que l'écho est mort).
RESSOURCES
Pack complet de WAs pour le raid créé par Reloe (https://www.patreon.com/Reloe).
Il contient 2 groupes différents :
-Un pour les techniques où il faut assigner des joueurs spécifiques.
-Un pour tout ce qui est barres/icônes/textes pour traquer les techniques des boss.
La plupart des assignations sont faites automatiquement en Normal & Héroïque, pas besoin de notes.
L'add-on Northern Sky Raid Tools et la WeakAura sont REQUIS pour que tout fonctionne.
Add-on obligatoire pour faire fonctionner les WAs Northern Sky créé par Reloe (https://www.patreon.com/Reloe).
Tout le monde dans votre raid doit l'installer pour que les WAs Northern Sky fonctionnent.
Il vous permet aussi de partager facilement des WAs à votre groupe, de diviser votre raid en 2 d'un seul clic, etc.
Add-on qui ajoute plein de sons de synthèse vocale à votre jeu, créé par Causese.
Il vous permet d'ajouter des alertes sonores claires à votre Bossmod ou vos WeakAuras pour réagir mieux et plus vite.
