
- Throne of Thunder
- Manaforge Omega
- MSV / HoF / ToES
- Liberation of Undermine
- Dragon Soul
- Palazzo dei Nerub-ar
- TotFW / BWD / BoT
- Aberrus
- Icecrown Citadel
- Ruby Sanctum
- Trial of the Crusader
- Rotmire
- Imperator Averzian
- Vorasius
- Vaelgor & Ezzorak
- Fallen-King Salhadaar
- Lightblinded Vanguard
- Crown of the Cosmos
- Chimaerus the Undreamt God
- Belo'ren, Child of Al'ar
- Midnight Falls
- Immerseus
- Fallen Protectors
- Norushen
- Sha of Pride
- Galakras
- Iron Juggernaut
- Kor'kron Dark Shaman
- General Nazgrim
- Malkorok
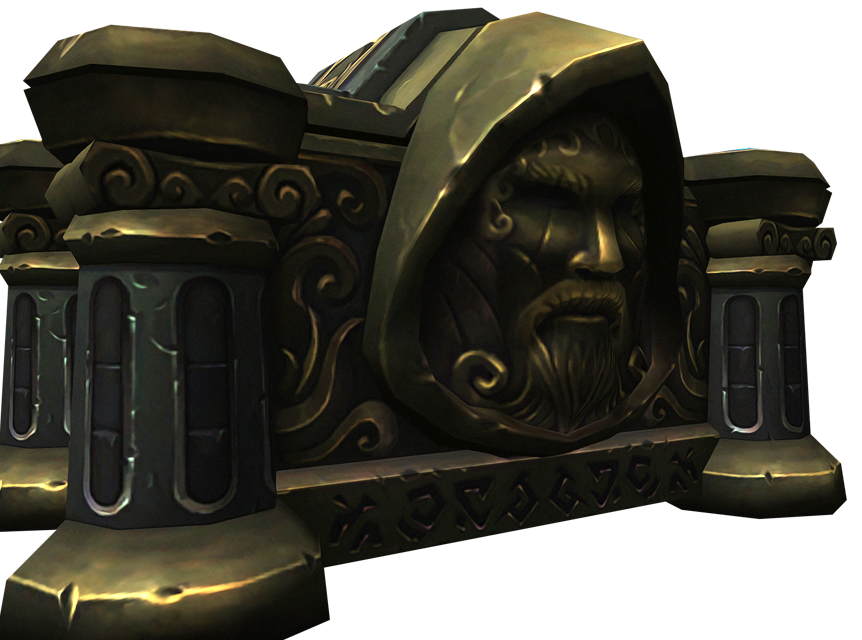
- Spoils of Pandaria
- Thok the Bloodthirsty
- Siegecrafter Blackfuse
- Paragons of the Klaxxi
- Garrosh Hellscream
- Jin'rokh the Breaker
- Horridon
- Council of Elders
- Tortos
- Megaera
- Ji-Kun
- Durumu the Forgotten
- Primordius
- Dark Animus
- Iron Qon
- Twin Empyreans
- Lei Shen
- Ra-den
- Plexus Sentinel
- Loom'ithar
- Soulbinder Naazindhri
- Forgeweaver Araz
- The Soul Hunters
- Fractillus
- Nexus-King Salhadaar
- Dimensius, the All-Devouring
- The Stone Guard
- Feng the Accursed
- Gara'jal the Spiritbinder
- The Spirit Kings
- Elegon
- Will of the Emperor
- Imperial Vizier Zor'lok
- Blade Lord Ta'yak
- Garalon
- Wind Lord Mel'jarak
- Amber-Shaper Un'sok
- Grand Empress Shek'zeer
- Protectors of the Endless
- Tsulong
- Lei Shi
- Sha of Fear
- Vexie and the Geargrinders
- Cauldron of Carnage
- Rik Reverb
- Stix Bunkjunker
- Sprocketmonger Lockenstock
- One-Armed Bandit
- Mug'Zee, Heads of Security
- Chrome King Gallywix
- Morchok
- Warlord Zon'ozz
- Yor'sahj the Unsleeping
- Hagara the Stormbinder
- Ultraxion
- Majordomo Staghelm
- Spine of Deathwing
- Madness of Deathwing
- Ulgrax the Devourer
- Bloodbound Horror
- Sikran, Captain of the Sureki
- Rashanan
- Broodtwister Ovinax
- Nexus Princess Kyveza
- Silken Court
- Queen Ansurek
- Conclave of Wind
- Al'akir
- Omnotron Defense System
- Magmaw
- Atramedes
- Chimaeron
- Maloriak
- Nefarian
- Halfus Wyrmbreaker
- Valiona & Theralion
- Ascendant Council
- Cho#gall
- Sinestra
- Kazzara
- The Amalgamation Chamber
- The Forgotten Experiments
- Assault of the Zaqali
- Rashok, the Elder
- Zskarn
- Magmorax
- Echo of Neltharion
- Scalecommander Sarkareth
- Lord Marrowgar
- Lady Deathwhisper
- Gunship Battle
- Deathbringer Saurfang
- Festergut
- Rotface
- Professor Putricide
- Blood Prince Council
- Blood-Queen Lana'thel
- Valithria Dreamwalker
- Sindragosa
- The Lich King
- Halion
- Northrend Beasts
- Lord Jaraxxus
- Faction Champions
- Twin Val'kyr
- Anub'Arak
Siege of Orgrimmar
Spoils of Pandaria
Guida alla Strategia
The raid needs to split up to deal with half the room each, starting in two quadrants.
Group 1 starts in Mogu -> Mantid.
Group 2 does Mantid -> Mogu.
You need to open crates to fill up the Energy bar to finish the quadrant before time runs out.
There are 3 sizes of Crates (Lightweight, Stout, Massive), giving 1, 3, and 14 Energy.
Localizzazione italiana a cura di Lunaedge. Per qualsiasi domanda, correzione o richiesta di chiarimento è possibile contattarmi su una delle piattaforme presenti nel link, preferibilmente Discord!
The fight starts after a player interacts with the middle console.
Jump down ASAP to avoid the ticking damage from Unstable Defense System.

Once you use the middle console to start the fight, a countdown begins and players take damage if they have not jumped down to a quadrant.
Once you use the middle console to start the fight, a countdown begins and players take damage if they have not jumped down to a quadrant.
Pandaren crates can be found around the room.
These will spawn either a Brewmaster, Mistweaver, or a Windwalker enemy.
The Brewmasters will buff tanks when killed, Mistweavers buff healers, and Windwalkers buff DPS.
EVERYONE
HEAL AND KILL SPIRIT

During a 4-second channel, the Mistweaver Spirit pulls all players within 40 yards in, dealing ticking damage to all players within 10 yards.
The Mistweaver Spirit passively heals herself for 150% of the damage she deals with Eminence.
EVERYONE
SPREAD AND AVOID FRONTAL

The Brewmaster Spirit throws a keg at a random ranged player, dealing damage within 5 yards and slowing movement speed by 50%.
It also casts Breath of Fire, which is a frontal attack dealing fire damage to all players hit.
If the player hit is also affected by Keg Toss, they get a 6-second disorient, which can be dispelled.
EVERYONE
AVOID FIRE

The Windwalker Spirit charges a random ranged player, leaving a trail of fire and stunning any players within 3 yards of the targeted location for 6 seconds.
If any player touches the fiery trail, they explore and deal a large amount of damage within 3 yards.

When the Brewmaster Spirit is defeated, it gives a boon to all tanks within this quadrant, giving them a chance on attack to deal Nature damage to all enemies within 4 yards, and stunning them for 1.5 seconds.
This has a 15-second internal cooldown.
When the Brewmaster Spirit is defeated, it gives a boon to all tanks within this quadrant, giving them a chance on attack to deal Nature damage to all enemies within 4 yards, and stunning them for 1.5 seconds.
This has a 15-second internal cooldown.
We'll start the guide with Mogu crates. These are the crates located in the Mogu quadrants.
Make sure to move Modified Anima Golems from Crimson Reconstitution pools, and stand in Matter Scramble.
Move Mogu Shadow Ritualists from the Mogu Rune of Power.
Dispel Torment.
Interrupt Forbidden Magic, Harden Flesh, and Earthen Shard when possible.
Kill Sparks.
EVERYONE
CLEAR STATUES

The Massive Mogu Crates contain one of the Shao-Tien Elder Council mobs.
These share two abilities: Return to Stone and Strength of the Stone, and then have one unique ability each.
Return to Stone is cast on random players, knocking them back and dealing some damage. This then spawns a Stone Statue at their position. Each Stone Statue alive buffs the Shao-Tien mobs by 10% damage.
The Stone Statues can and should be killed.
The unique abilities of each Council mob deal damage to the raid.
Jun-Wei casts Shadow Volley.
Zu Yin casts Molten Fist.
Xiang-Lin casts Jade Tempest.
Kun-Da casts Fracture.
EVERYONE
STAND IN BEAM

Modified Anima Golem can spawn from Stout Crates. They spawn two beams in the room, which swap the location of the players standing in them after a few seconds.
If no players are in the beams, the entire raid takes a massive amount of damage.
TANK
MOVE MOBS FROM HEAL

Modified Anima Golem can spawn from Stout Crates. They create void zones around nearby units. Any enemies standing in the void zone is heale dfor 15% of their max health every second.

Mogu Shadow Ritualist is one of the options from a Stout Mogu Crate.
Mogu Shadow Ritualists spawn runes of power below them, which players can stand in to increase their damage.
Tanks should move mobs out of the Rune of Power when possible.

Animated Stone Mogu is one of the options from a Lightweight Mogu Crate.
They can cast Harden Flesh and Earthen Shard.
Both of these spells can be interrupted.
Harden Flesh is a dispellable dot that deals damage and slows the target by 30% every second.
Earthen Shard is an interruptable cast that deals some damage to the target.

A Lightweight Mogu Crate can also spawn several Quilen Guardians.
These need to be tanked and apply a stacking bleed on the target.

Mogu Shadow Ritualists channel Forbidden Magic, dealing damage to their target.
This can and should be interrupted when possible.

A Lightweight Mogu Crate can also contain a Burial Urn.
They do nothing on their own, but they do spawn other adds called Spark of Life.
Spark of Life deals high pulsing damage to any players within 4 yards, and explodes in an 8-yard range when they die.
MOVE from dying Sparks!
Mogu Shadow Ritualist is one of the options from a Stout Mogu Crate.
Mogu Shadow Ritualists spawn runes of power below them, which players can stand in to increase their damage.
Tanks should move mobs out of the Rune of Power when possible.
Mogu Shadow Ritualists channel Forbidden Magic, dealing damage to their target.
This can and should be interrupted when possible.
Animated Stone Mogu is one of the options from a Lightweight Mogu Crate.
They can cast Harden Flesh and Earthen Shard.
Both of these spells can be interrupted.
Harden Flesh is a dispellable dot that deals damage and slows the target by 30% every second.
Earthen Shard is an interruptable cast that deals some damage to the target.
A Lightweight Mogu Crate can also contain a Burial Urn.
They do nothing on their own, but they do spawn other adds called Spark of Life.
Spark of Life deals high pulsing damage to any players within 4 yards, and explodes in an 8-yard range when they die.
MOVE from dying Sparks!
A Lightweight Mogu Crate can also spawn several Quilen Guardians.
These need to be tanked and apply a stacking bleed on the target.
In the Mantid quadrants, make sure to drop your Set to Blow bombs ASAP and away from the raid.
Dispel Residue and Rage of the Empress on the mobs.
Kite Enraged Warcallers.
Avoid Windstorm tornadoes and Encapsulated Pheromone clouds.
IF TARGETED
MOVE AND DROP BOMBS

Ka'thik Demolishers throw bombs at random players, which gives them an Extra Action Button and 5 stacks of bombs to clear.
Using the Extra Action Button drops the bombs on the floor, so make sure to move to an area the raid does not need to use, and drop as many bombs as possible before they explode.
Make sure to move away after to not blow up the bombs!
While the Demolishers are alive, they deal ticking Nature damage to all players with Pheromone Cloud.
EVERYONE
DON'T GET HIT BY TORNADO

Set'thik Wind Wielders create tornadoes that move around the room in spirals.
Make sure to avoid, as this moves faster the longer it is up.

Set'thik Wind Wielders rally nearby friendly targets, increasing their damage done by 50% for 30 seconds.
This can and should be dispelled on high health enemies.

Sri'thik Bombardiers throw explosives at random players, dealing damage to anyone in a 2-yard radius.
Spread out to decrease damage taken!

Zar'thik Amber Priests occasionally summon additional Mantids to help.

The Amber-Encased Kunchongs leave trails of pheromones, which move towards nearby players.
Avoid standing in this cloud to reduce damage taken.

Sri'thik Bombardiers hit random ranged players with a bomb, dealing damage in a 5-yard area around them.
This also leaves a pool on the floor. Move away!

Zar'thik Amber Priests buff Residue on nearby friendly targets, which heals them over time.
This should be dispelled ASAP to reduce healing!

Kor'thik Warcallers enrages themselves, increasing their damage dealt by 350%, but decreasing their movement speed.
While they are enraged, their melees have e a chance to decrease armor by 25% for 1 minute, which stacks.
Tanks need to KITE when they are enraged.
Set'thik Wind Wielders rally nearby friendly targets, increasing their damage done by 50% for 30 seconds.
This can and should be dispelled on high health enemies.
Sri'thik Bombardiers hit random ranged players with a bomb, dealing damage in a 5-yard area around them.
This also leaves a pool on the floor. Move away!
Sri'thik Bombardiers throw explosives at random players, dealing damage to anyone in a 2-yard radius.
Spread out to decrease damage taken!
Zar'thik Amber Priests buff Residue on nearby friendly targets, which heals them over time.
This should be dispelled ASAP to reduce healing!
Zar'thik Amber Priests occasionally summon additional Mantids to help.
Kor'thik Warcallers enrages themselves, increasing their damage dealt by 350%, but decreasing their movement speed.
While they are enraged, their melees have e a chance to decrease armor by 25% for 1 minute, which stacks.
Tanks need to KITE when they are enraged.
The Amber-Encased Kunchongs leave trails of pheromones, which move towards nearby players.
Avoid standing in this cloud to reduce damage taken.
